Google Play Product Setup
To set up products for Android devices, start by logging into Google Play Console. Google Play Console is Google's central hub for managing app releases, testing, in-app purchases, and more.
This guide assumes basic knowledge of Google Play Console, as well as having an app set up and ready for adding in-app purchases. For more information, visit Google's documentation and guides for Google Play Console.
Create an In-App Product or Subscription
You'll need to have an APK uploaded before you can create in-app products. Check out our guide on sandbox testing on Android for details on how to upload an APK and roll out a release on a closed test track.
To create an in-app product or subscription, go to Google Play Console's 'All Applications' page and select your app from the list.
In the sidebar, select the Products dropdown. Depending on your in-app product type, you will either choose In-app products or Subscriptions.

After clicking Create, provide a couple pieces of metadata to Google:
| Metadata | Description |
|---|---|
| Product ID | The product ID is a unique alphanumeric ID that is used for accessing your product in development and syncing with RevenueCat. After you use a Product ID for one product in Google Play Console, it can’t be used again across any of your apps, even if the product is deleted. |
| Name | A short name of the item, up to 55 characters. This will be displayed on your Google Play Store listing. |
Tips for creating robust product IDs
After you use a Product ID for one product in Google Play Console, it can’t be used again across any of your apps, even if the product is deleted. It helps to be a little organized here from the beginning - we recommend using a consistent naming scheme across all of your product identifiers such as:
<app>_<entitlement>_<version>
- app: Some prefix that will be unique to your app, since the same product Id cannot but used in any future apps you create.
- entitlement: A name for what the product provides access to, e.g., "premium"
- version: A version number
For example, using this format the identifier for your first product that grants access to a "premium" subscription would be:
rc_premium_v1

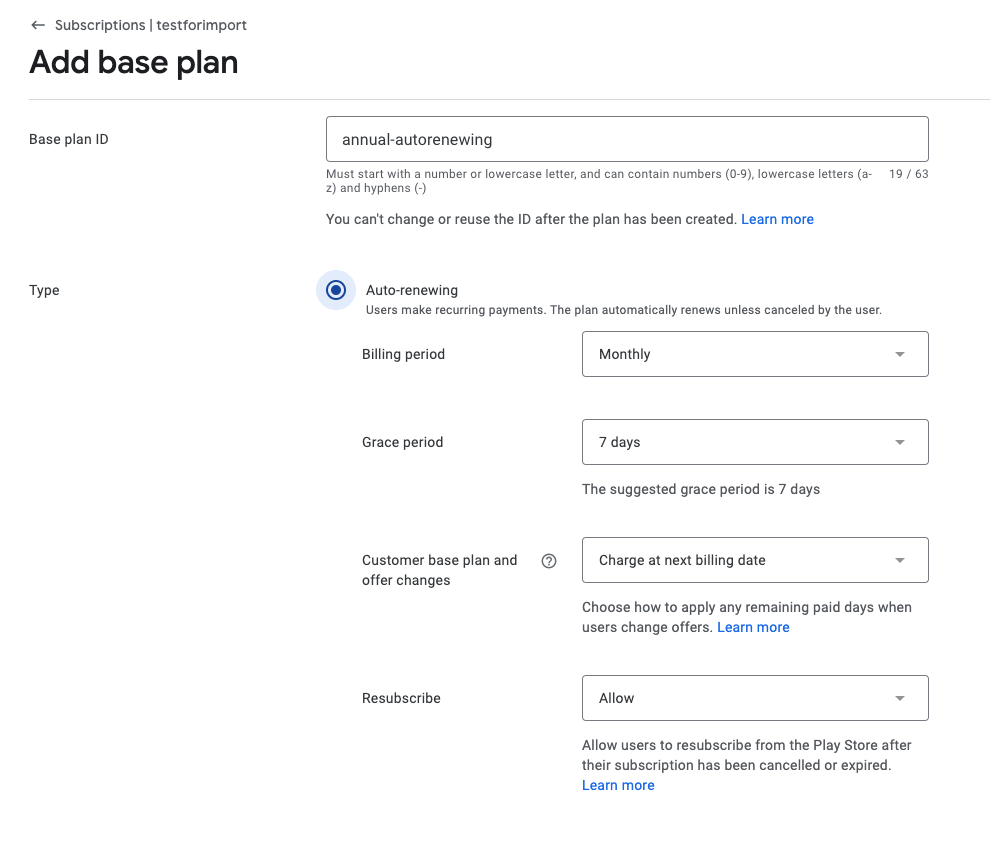
Create a base plan
For subscription products, you'll need to add a base plan. Base plans define a billing period, price, and renewal type for purchasing your subscription. Customers never purchase a subscription product directly, they always purchase a base plan of a subscription.
Click "Add base plan" and fill out the associated fields. Make sure to set a price, and click "Activate". Since Google introduced multiple base plans with Billing Client 5, it's good practice to be as clear as possible when naming your plans, such as: <duration>-<renewaltype>, eg. annual-autorenewing.
When Google introduced the new subscription features in May 2022, all existing subscriptions were migrated to subscription products with a single base plan. That base plan has an identifier representing the duration, like P1Y which stands for annual.
RevenueCat Products map to Base Plans for Google Play subscriptions, since those are the products that customers can purchase. Newly set up products in RevenueCat follow the identifier format <subscription_id>:<base-plan-id>, whereas products that were set up before February 2023 follow the identifier format <subscription_id>.
Old versions of RevenueCat SDKs do not support Google's new subscription features such as multiple base plans per subscription product. Only base plans marked as "backwards compatible" in Google Play Console are available in these SDK versions. Learn more. Only one base plan per subscription can be marked as backwards compatible.
To mark a base plan as backwards compatible, click the overflow menu on the base plan and select "Use for deprecated billing methods".

(Optional) Create an offer
If you wish to create an offer for your base plan, you can do so from the subscription page by clicking "Add offer". Offers can be free trials, discounts, or simply special price setups that apply when a customer first purchases a subscription.

You can then select a product ID, eligibility, and offer phases.
Old versions of RevenueCat SDKs do not support Google's new subscription features such as multiple offers per base plan. Only offers marked as "backwards compatible" in Google Play Console are available in these SDK versions. Learn more. Only one offer per base plan can be marked as backwards compatible.
To mark an offer as backwards compatible, click the overflow menu and select "Use for deprecated billing methods".
Making Subscriptions Editable, InAppProduct API
RevenueCat does not use the InAppProduct API for subscriptions. You are safe to make subscriptions editable, unless you are manually using this API outside of RevenueCat.
This is related to this notice:


If you are relying solely on RevenueCat for your subscriptions, you can safely select "Make editable".
Integrate with RevenueCat
If you're ready to integrate your new Google Play in-app product with RevenueCat, continue our product setup guide .